Pages

Thursday, 29 April 2010

Sky / environment light

I've been experimenting with a new way of illuminating interior scenes from the outside. Previously this was done during the final gather phase and would usually require a large number of samples to converge on a smooth result. Whilst this isn't normally a problem I wanted to see if direct lights could provide any benefits. It's possibly to use blue area lights to mimic the effect but the result tends to be too uniform.

So here it is, a new light type which is quite similar to an area light only instead of illuminating the scene with a single color the incoming lights direction is used to look up an environment probe. This technique will mainly be used to light interior scenes with relatively small openings to the outside world. In addition to easing the burden of the final gather process it gives a lot of artistic control over the behavior of environmental light sources.

Note, the images here are quite noisy because I've neglected to perform a diffuse convolution on the environment maps.


Tuesday, 27 April 2010

Sun light

I finally got around to building a basic sun light system. It's very similar to the area light system except that an orthographic projection is used to create the shadow maps. Again, as with area lights, soft shadows are created by multisampling the light in random positions. Increasing the size of the position offset leads to softer shadows, I didn't think this would be usefull but it actually allows for a nice slightly overcast day sort of effect ( although in these shots I've kept the radius small). All these images use a single sunlight and environment light.


BugBackToad model by SonK, which can be found at http://ompf.org/forum/viewtopic.php?f=7&t=752


Sun light in an interior space:
3 objects each with a 512 x 512 lightmap.

1st pass, 2640 FG samples: 33 seconds

2nd pass, 4640 FG samples: 1 minute

3rd pass, 8640 FG samples: 1 minute 44 seconds

Friday, 23 April 2010

Simplifying the UV process and more area lights

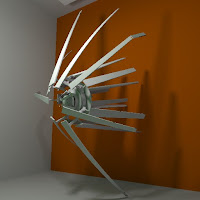
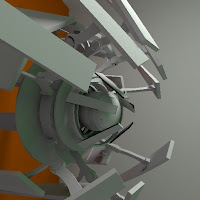
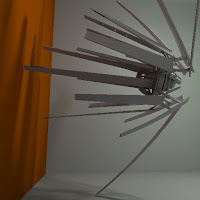
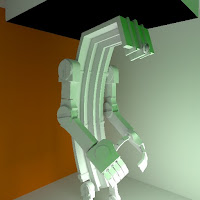
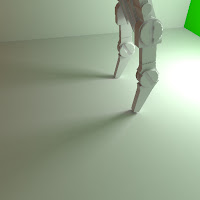
Thought I'd post some more test images. I built this little guy a few years back for a short animated film project and he's been gathering dust ever since. I've recently been experimenting with an automatic UV unwrap tool so I thought I'd try it out on him. Max's built in auto unwrap is okay for geometry with hard angles but it tends to create a lot of separate UV charts when presented with curved surfaces. This UV tool does the whole thing remarkably well with one button click which is brilliant. These shots are all straight from the lighting tool.

Scene Stats:
5 / 6 objects each using a 512 x 512 lightmap
1280 FG samples
Render time: ~17 seconds

Environment light only

Environment light + cylindrical area light

1 cylindrical area light + 2 rectangular area lights

And some stills from the original animation just for the hell of it :)

Friday, 16 April 2010

Area lights 2

Thought I'd show some more progress on area lights. In the previous images, the light's position and radius had to be specified in code so my first task was to enable the export of lights directly from the max scene. This was fairly easy as it only involved exporting the lights transform matrix, color, width, length, radius (used for sphere or disc type lights) and sample count. 3DS max photometric lights have all of the above properties so there was no need to script any custom object types.

The rectangular area lights shown here are very similar to the spherical area lights shown in the previous post. The biggest difference being that these rectangular lights primarily radiate along one axis.

2 512x512 light maps render time: 2m30s

3 512x512 light maps render time: ~1m (only used 640 FG samples so the solution is a bit rough)

8 512x512 light maps render time: ~3m

8 512x512 light maps render time: ~3m

Monday, 12 April 2010

High Quality GPU soft shadows

I recently got around to trying out a high quality GPU shadow method. Whilst I'm happy with the way final gather is working it's not very good at accurate shadows. The limited number of FG rays means the shadows tend to be overly soft. Things improve with an increased ray count but it hurts render times.

The technique I'm using is a pretty straightforward extension of regular shadow mapping. It involves rendering multiple shadow maps from offset positions and averaging the results. For the sphere area light seen here, 256 randomly jittered offset vectors were generated and used to render multiple depth cube maps. The quality of the shadow map increases with the number of samples used and larger lights require more samples.

Shown below is a spherical area light. Other types of area light sources such as disc or rectangle lights are also possible.


Render times:

Sponza 13 lightmaps ~1min 30s
Cornell - Spheres 8 lightmaps ~0min 55s
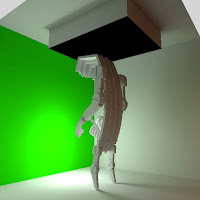
Cornell - Robot1 8 lightmaps ~0min 49s
Cornell - Robot2 8 lightmaps ~0min 49s

Notes:
> Shadow map for all scenes rendered in roughly 2 seconds.
> Each lightmap is 512x512
> Roughly 2600 final gather samples used in all scenes.